
Pasasana is a challenging pose in the Ashtanga yoga intermediate series. It requires strength, flexibility, and balance, making it quite demanding anatomically.
As with any yoga posture, it’s important to approach Pasasana mindfully, listening to your body and respecting its limitations. Regular practice, along with proper warm-up and preparation, can help gradually improve your ability to perform this pose safely and effectively. Additionally, the guidance of a qualified yoga instructor can be invaluable in learning and refining more challenging poses like Pasasana.
Skandasana Basics
| Sanskrit Pronunciation | Pasasana (pAsh-Ah-suh-nuh) |
| Meaning | ‘Pasa’ means ‘tie,’ or ‘noose’ and ‘Asana’ is ‘Pose |
| Pose Type | Full squat |
| Pose Level | Intermediate series pose |
| Style of yoga | Ashtanga yoga |
| Other Names | Noose Yoga |
| Stretches | Muscles of the neck, shoulders, chest, groin, thighs, and ankles |
| Strengthening | The Legs |
| Duration | 30 second to 3 minutes |
Meaning
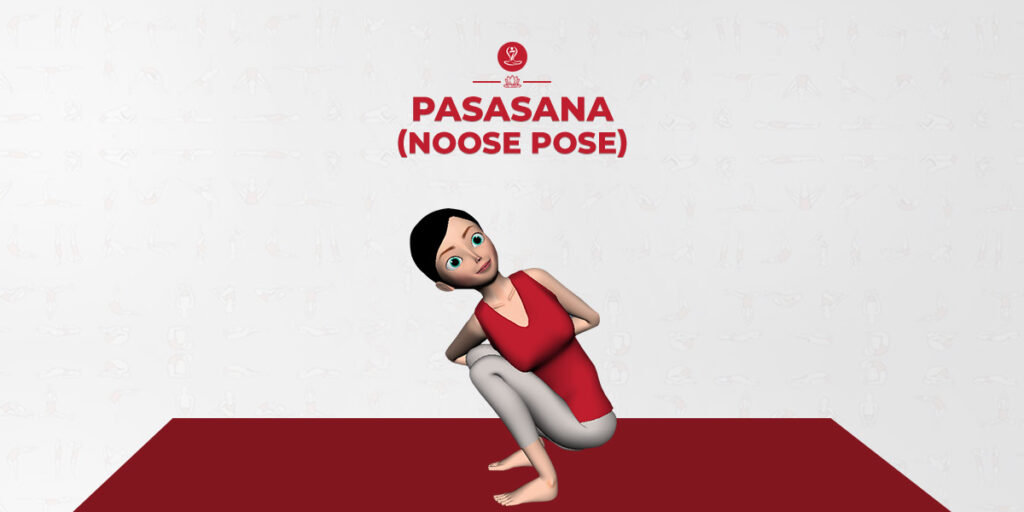
It is derived from the Sanskrit words Pasa (noose, tie or snare) and Asana (yoga posture), which is popularly called Noose Pose.
Pasasana (pronounced pAsh-Ah-suh-nuh), is a twister. that challenges our faith in what the body can do, and should be able to do. Although it looks simple, it is deceptively deep.
In Ashtanga yoga, Pasasana is the first seated posture in the second series, but it comes with various versions which are easy to start with.
The pose involves a deep squat while twisting the torso and binding the arms around the bent leg. This combination requires openness in the hips, shoulders, and spine, as well as core strength to maintain stability in the pose.
Practice Guide For Pasasana (Noose Yoga Pose)
Pasasana involves a sequence of movements that challenge the practitioner’s strength, flexibility, and focus. To facilitate a step-by-step approach, the pose is divided into key components, allowing practitioners to grasp each element before attempting the full pose. These components typically include the initial posture, transitional phases, and the final position.
Preparatory Pose
Beginner Tips
Beginners are advised to perform this pose near a wall or sit on a chair (to get support). Press the left hand to the outside of the right knee.
Steps to do Noose Pose
Pasasana First Variation
- To come to Pasasana (Noose Pose), First of all, you need to stand in Tadasana (Mountain Pose) with your feet together. with your feet hip-width and parallel to each other. In this position, if needed stand with the wall on your right side and place a folded blanket next to the wall. Put your heels on the blanket and forearm’s distance away from the wall.
- Now, Exhale and bend your knees and come into a full squat. bring your buttocks on your heels. Make sure your heels must be raised. for it, you can use folded blanket or sandbag.
- After that, turn your knees slightly to the left.
- With an exhalation, turn your torso to the right and press your both hands into the wall. Put your right hand on the wall at the same height as your right shoulder and your left arm up to the wall.
- Last, inhale, squeeze your legs together, extend your spine, and twist toward the wall.
- Scoop your tailbone, upper backbend, and twist more deeply.
- Maintain the pose as long as you can. and repeat the other side.
Pasasana Second Variation
- To come in the second variation, repeat all of the same instructions of the first variation.
- Now, turn your left arm in, widening your elbow out to the side. turn your left palm down as you bend your elbow to wrap the forearms around the right shin.
- Then sweep your right hand to the back and hold your left wrist with your right hand. Or clasp your hands behind your back.
- If your hands can’t clap all the way then hook only fingers.
- Squeeze your knees together and turn your head to the right, and pull your shoulder blades backward.
- Maintain this pose as you feel comfortable, Or a few seconds and release. and slowly discharge the pose.
- Rest for a while and follow the same procedure by twisting to your left.
Follow-up Poses
- Ardha Matsyendrasana (Half Lord of the Fishes Pose)
- Marichyasana III (Marichi’s Pose, variation III).
Benefits of Pasasana
Strengthens the legs: Pasasana deeply engages the muscles of the thighs, hamstrings, and calves, helping to build strength and stability in the lower body.
Stimulates digestion: The deep lunge position in Pasasana can massages the abdominal muscles stimulating the internal organs, potentially aiding digestion and metabolism.
Stretches and improves flexibility: In pasasana as the stretches the shoulders, thighs, and groin that regions expand the surrounding muscles and enhance flexibility.
Improves Spinal Flexibility: The twisting action in Pasasana helps to increase the flexibility of the spine, particularly in the thoracic region.
Enhances Detoxification: Twisting poses like Pasasana can help to stimulate the organs involved in detoxification, such as the liver and kidneys, thereby aiding in the elimination of toxins from the body.
Calms the Mind: Pasasana requires mindful concentration and controlled breathing, which can help to calm the mind and reduce stress and anxiety.
Improves Spinal Flexibility: The twisting action in Pasasana helps to increase the flexibility of the spine, particularly in the thoracic region.
Develops Core Strength: Engaging the core muscles is essential for maintaining stability in Pasasana, which helps to develop strength in the abdominal muscles and improve overall core strength.
Stimulates Energy Flow: According to yoga philosophy, twisting poses like Pasasana help to stimulate the flow of prana (life force energy) throughout the body, promoting overall vitality and well-being.
Precautions & Contraindications
Practicing Pasasana in the morning is often recommended by experts due to several reasons, including better digestion and higher energy levels. However, if practicing in the morning isn’t feasible for some reason, practicing in the evening can still be beneficial.
It’s important to maintain a gap of 3-5 hours between your last meal and your yoga practice, regardless of whether you’re practicing in the morning or evening. This allows for proper digestion and prevents discomfort during your practice.
As with any yoga pose, it’s essential to practice Pasasana mindfully and with proper alignment to avoid injury and reap the maximum benefits.
- Pasasana must avoid deep squats with any knee injury.
- Do not practice in case of a herniated disk or an injury in the lower back.
- Avoid this Asana, in case of back, neck, ankles your arms injury.
Conclusion
Pasasana is a great stretch for the shoulder, spine, and chest as well as strengthens thighs, groin, ankles, and knees. It relieves back, shoulder, and neck pain. The pose also stimulates the abdomen organs that help to improve digestion and elimination and improve the nervous system’s function.